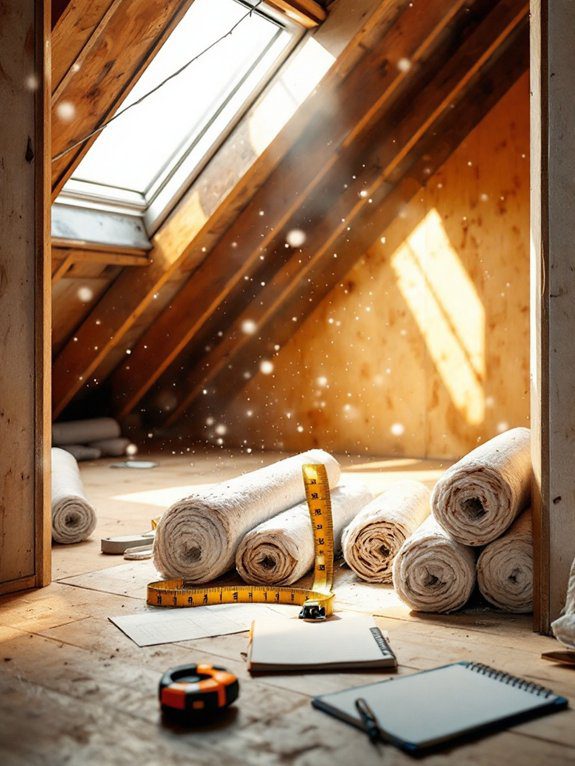
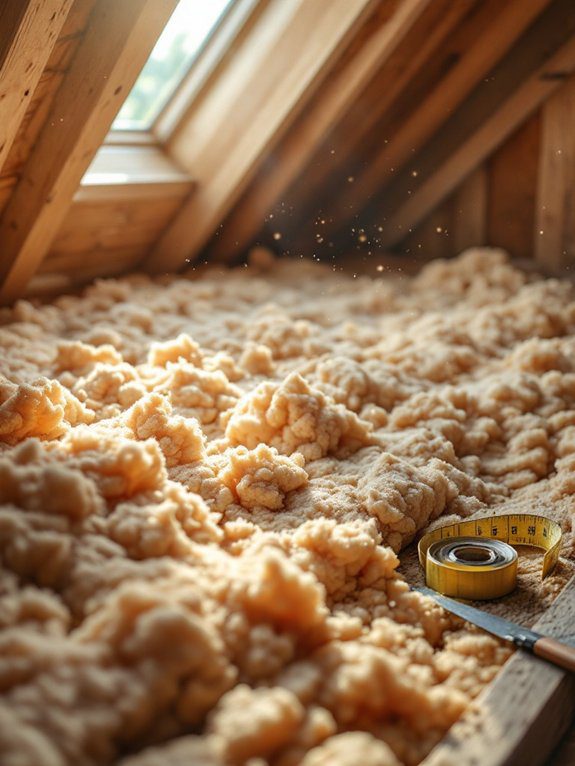
To properly insulate your loft, start by measuring the space and checking current insulation depth, aiming for 270mm thickness. You’ll need protective gear, basic tools, and your chosen insulation material – mineral wool, fiberglass, or cellulose. Clear the space, lift electrical cables, and lay the first layer between joists, followed by a cross-layer. Don’t forget to insulate around obstacles, seal the hatch, and maintain ventilation gaps. Discover specific measurements and advanced techniques to maximize your insulation’s effectiveness.
Key Takeaways
- Clear the loft space completely and inspect for damages, ensuring proper ventilation and checking electrical wiring safety.
- Select appropriate insulation material based on thermal performance, measuring between joists to determine required coverage.
- Install the first layer of insulation between joists, cutting material slightly wider than gaps for a snug fit.
- Add a second cross-layer perpendicular to joists, maintaining 270mm total thickness for optimal thermal efficiency.
- Seal access points and insulate around obstacles, keeping proper clearance from heat sources and maintaining ventilation gaps.
Assessing Your Loft Space and Requirements
Before beginning any loft insulation project, you’ll need to conduct a thorough assessment of your space to determine the most effective approach.
Start by identifying your loft type – whether it’s a traditional pitched roof or a modern flat design, as this will influence your insulation requirements and installation methods.
The type of loft you have – pitched or flat – directly determines which insulation approach will work best for your project.
Measure your current insulation depth and check for any gaps or damage. You’ll want to achieve the recommended 270mm thickness while ensuring proper ventilation, particularly around the eaves. Proper insulation installation can result in up to 25% less heat loss through your roof space.
Examine your roof structure for features like dormers or structural beams that might need special attention.
Don’t forget to evaluate any electrical wiring or plumbing that could affect installation.
If you’re working with a converted loft, you’ll need to take into account additional insulation for both the roof and walls to meet building regulations.
Keep in mind that requirements vary by region, with Northern climates typically needing 16-18 inches of insulation for optimal energy efficiency.
Gathering Essential Tools and Safety Equipment
A well-equipped toolbox forms the foundation of any successful loft insulation project. Your tool selection should include essential measuring and cutting implements: a tape measure, utility knife, and straightedge for precise material fitting. A putty knife can help maneuver insulation into corners and tight spaces for complete coverage.
Don’t forget a stapling tool and cutting board to guarantee clean, secure installation.
Safety protocols are non-negotiable when working with insulation materials. You’ll need proper protective gear, including a dust mask, safety glasses, gloves, and full-coverage clothing.
For challenging spaces, equip yourself with specialized tools like pronged poles and U hooks to reach tight spots safely.
Remember to gather additional equipment such as a caulking gun, work lights, and sturdy platforms for stable footing.
Maintaining good ventilation and an organized workspace will help you complete your project efficiently while prioritizing your safety.
Aim to achieve a 270mm depth of insulation material for optimal energy efficiency in your loft.
Choosing the Right Insulation Material

With your tools and safety equipment ready, selecting the right insulation material becomes your next key decision.
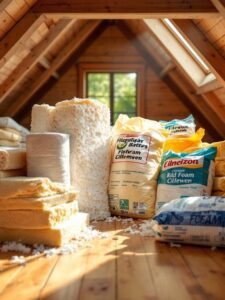
When comparing insulation types, you’ll need to take into account your loft’s specific requirements and your budget constraints. Different materials offer varying benefits regarding thermal performance, fire resistance, and moisture handling. Mineral wool delivers superior thermal conductivity at 0.044 W/mK. Spray foam options provide excellent air sealing capabilities but require professional installation.
- Fibreglass rolls provide cost-effective insulation with an R-value of 2.2-2.7 per inch, ideal for basic storage lofts.
- Mineral wool excels in both fire resistance and sound dampening, perfect for converted spaces.
- Sheep’s wool offers a natural, breathable solution that manages moisture effectively.
- Cellulose delivers higher R-values (3.2-3.8 per inch) and eco-friendly benefits.
- Rigid boards like polystyrene provide excellent insulation for finished loft spaces, though at a higher cost.
Take into account your loft’s intended use and local building regulations when making your material selection.
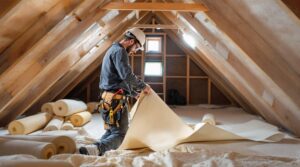
Preparing Your Loft for Installation
Proper preparation of your loft space guarantees a smooth and effective insulation installation process. When implementing key loft preparation techniques, you’ll need to first clear out stored items and inspect existing insulation. Remove any damaged layers and verify electrical cables are safely secured away from your work area. Having a helper present during the installation will ensure safer and more efficient work. It’s crucial to choose proper materials based on your specific loft type and budget considerations.
| Safety Measure | Why It’s Important | What You’ll Need |
|---|---|---|
| Lighting Setup | Prevent accidents | Battery lights |
| Protective Gear | Personal safety | Gloves, goggles, mask |
| Power Off | Avoid shock risks | Circuit breaker access |
| Crawl Boards | Safe movement | Sturdy wooden boards |
| Ventilation Check | Prevent moisture | Vent inspection tools |
Following these insulation safety tips, you’ll need to seal any air leaks around vents and cables using appropriate sealants. Don’t forget to maintain proper ventilation by keeping eave vents unobstructed and verifying adequate airflow throughout your loft space.
Installing the First Layer Between Joists
Now that your loft space is clean and secure, laying the first insulation layer between joists marks the start of the main installation process.
When using standard insulation techniques, you’ll want to measure your joist spacing first, typically 400mm, to guarantee proper fitting. Select your insulation material based on the depth of your joists and cut pieces to size using a sharp utility knife. Installing insulation material to a depth of 270mm to 300mm is required to meet current building regulations. Proper installation can reduce heat loss by up to 25% through your roof space.
- Roll out the insulation between joists, making sure it fits snugly without compression
- Cut the material slightly wider than the gap to prevent heat loss at edges
- Work systematically from the loft entrance backward, maintaining a clear exit path
- Keep the material level with joist tops to prepare for the second layer
- Use protective covers around electrical fixtures and downlighters
Remember to wear appropriate safety gear while handling insulation materials, and avoid stepping directly on joists or insulation during installation.
Adding the Second Cross-Layer Coverage
Once you’ve completed the first layer, installing a second cross-layer greatly enhances your loft’s thermal efficiency and eliminates potential cold spots. This critical step boosts thermal performance while reducing installation errors. You’ll want to lay this thinner layer perpendicular to your joists, using approximately one-fourth the thickness of your first layer. Modern standards recommend a total thickness of 270mm for optimal energy efficiency in UK homes.
| Task | Key Consideration |
|---|---|
| Material Selection | Choose fiberglass, rockwool, or cellulose based on your needs |
| Safety Prep | Wear goggles, gloves, and dust mask |
| Positioning | Lay perpendicular to joists, avoid compression |
| Cable Management | Lift electrical cables above insulation |
| Clearance | Maintain space around heat sources |
Remember to lay the second layer without cutting wide rolls into narrow strips, as this helps prevent gaps. Keep the material snug but not compressed, and guarantee complete coverage across your loft space for ideal insulation performance.
Insulating Around Obstacles and Fixtures

After completing your cross-layer coverage, you’ll encounter various obstacles in your loft that require special attention during insulation.
Using proper insulation techniques while maintaining safety precautions around electrical components, plumbing fixtures, and ventilation systems is essential for an effective installation.
Creating a proper air gap with battens of approximately 50mm is crucial for maintaining adequate ventilation in your loft space.
- Keep loose-fill insulation contained in areas with complex shapes, guaranteeing complete coverage around irregular obstacles.
- Maintain a 75mm clearance between insulation and hot surfaces like chimneys, flues, and recessed lights.
- Install insulation guards around electrical fixtures and verify power is off before adjusting any cables.
- Leave a 12mm gap between insulation and hot water pipes to prevent moisture buildup and maintain efficiency.
- Check that ventilation channels remain unobstructed, using grilles to protect openings while allowing proper airflow.
Sealing the Loft Hatch and Access Points
Properly sealing your loft hatch represents a critical step in achieving ideal home insulation, as these access points often become major sources of heat loss when left untreated. Begin by identifying key loft hatch features, including its type, dimensions, and existing insulation status. Following a thorough weatherstripping application process will create an effective air-tight barrier against heat escape.
| Sealing Component | Application Method | Material Options |
|---|---|---|
| Frame Perimeter | Apply compression seals | Rubber tubing, foam strips |
| Hatch Surface | Attach insulation board | PIR board, glass wool |
| Access Points | Install securing hooks | Hook eyes, latches |
Apply draught-proofing strips around the frame’s perimeter, ensuring continuous contact when closed. For enhanced performance, combine sealing techniques by adding rigid board insulation to the hatch’s upper surface while maintaining the required U-value of 0.16 W/m²K. Remember to verify the hatch remains easily accessible and operational after completing your improvements.
Testing the Insulation Performance
With your loft hatch properly sealed, verifying the effectiveness of your insulation through systematic testing helps guarantee ideal thermal performance.
You’ll want to focus on key performance metrics that indicate how well your insulation is working. While professional thermal testing equipment provides the most accurate results, you can conduct basic assessments to evaluate your insulation’s effectiveness.
- Monitor your home’s energy consumption before and after installation to track improvements
- Use an infrared thermometer to check for temperature variations across insulated areas
- Install a digital temperature sensor in your loft to compare readings with living spaces
- Check for any cold spots or drafts that might indicate gaps in insulation coverage
- Document room temperatures throughout your house during different weather conditions to assess thermal consistency
Materials like SISALWOOL Loft Roll provide excellent sound dampening properties that can be evaluated by noting noise reduction from outside sources.
Maintaining Your Loft Insulation System
The long-term effectiveness of loft insulation depends on a robust maintenance strategy that combines regular inspections with preventive measures.
You’ll need to establish a routine that includes moisture control through proper ventilation and dehumidification, while regularly checking for leaks that could compromise your insulation’s performance.
Make pest prevention a priority by sealing entry points and installing protective mesh barriers.
You should schedule annual professional inspections that utilize thermal imaging to detect hidden issues.
When it comes to mold remediation, don’t wait – address any signs immediately through professional services.
Your inspection frequency should increase in areas prone to moisture or after severe weather events.
Remember to maintain clear space above your insulation and avoid compressing it with stored items, as this will preserve its insulating properties and extend its lifespan.
Consider consulting licensed installers to assess your insulation’s condition and recommend appropriate upgrades based on your home’s specific needs.
Frequently Asked Questions
Can I Install Loft Insulation if I Have Old Electrical Wiring?
You’ll need a professional inspection first due to safety concerns and wiring compatibility issues. Don’t proceed without an electrician’s assessment, as old wiring may need upgrading before you can safely install insulation.
How Long Does Loft Insulation Typically Last Before Needing Replacement?
Like a protective blanket over your home, your loft insulation’s 40-year lifespan can vary. You’ll need to watch for replacement indicators like moisture damage, pest issues, or rising energy bills to maintain its effectiveness.
Will Installing Loft Insulation Affect My Home’s Resale Value?
Yes, you’ll see increased resale value with loft insulation. It’s a desirable home improvement that offers long-term energy savings and comfort benefits. Studies show energy-efficient homes command higher market prices and attract quality buyers.
Can I Store Items Directly on Top of the Insulation?
Like crushing a delicate flower, placing items directly on insulation damages its effectiveness. For insulation safety and proper storage guidelines, you’ll need to install raised platforms or loft legs to protect your insulation’s performance.
Does Loft Insulation Help Keep My Home Cooler in Summer?
Yes, your loft insulation serves as a barrier against summer heat, improving your home’s energy efficiency. It’ll prevent excess warmth from entering your living spaces, helping maintain cooler temperatures and reducing cooling costs.
Conclusion
By following these 10 methodical steps, you’ve now successfully insulated your loft to professional standards. You’ll notice immediate improvements in thermal retention and energy efficiency, while your heating costs will decrease proportionally. Regular maintenance checks every 6-12 months will guarantee peak performance. When you combine proper installation with consistent monitoring, your insulation system will maintain peak efficiency for 20-25 years, delivering measurable energy savings throughout its lifespan.
References
- https://highloft.co.uk/blogs/blog-posts/a-comprehensive-10-step-guide-to-eco-friendly-loft-insulation
- https://www.uvalue.ie/knowledge-centre/blogs/how-to-insulate-your-loft-in-7-easy-steps
- https://effectivehome.co.uk/loft-insulation-installation-guide/
- https://atticexpertsky.com/3-steps-to-insulate-your-loft-yourself/
- https://www.energy.gov/energysaver/where-insulate-home
- https://the-loftroom.com/how-to-insulate-a-loft-conversion-the-process-and-considerations/
- https://www.theloftboys.co.uk/lofts/loft-insulation/
- https://materialsmarket.com/articles/how-to-insulate-a-loft/
- https://improveasy.com/news/your-guide-to-loft-insulation/
- https://www.jm.com/en/homeowner-insulation/homeowner-faq/what-tools-and-equipment-do-i-need-/