External wall insulation requires thorough preparation and professional expertise. You’ll need a qualified surveyor to assess your property’s structural integrity and determine insulation requirements. The process involves cleaning exterior surfaces, repairing damage, installing support frameworks, and applying insulation boards with proper adhesives and mechanical fixings. You’ll also need to secure building permits and comply with local regulations. Understanding the complete installation sequence will guarantee maximum thermal efficiency and long-term performance.
Key Takeaways
- Survey your property for structural issues, dampness, and necessary repairs before beginning the installation process.
- Clean exterior walls thoroughly with pressure washing and repair any cracks or damage before applying insulation.
- Install support systems using timber battens or aluminum rails, ensuring precise alignment with 400-600mm spacing.
- Apply insulation boards in a staggered pattern with proper adhesive coverage and mechanical fixings around windows and doors.
- Perform regular quality checks during installation and establish a maintenance schedule for cleaning and inspecting the insulation system.
Initial Property Assessment and Survey
A thorough property assessment serves as the critical first step before installing external wall insulation.
You’ll need a qualified surveyor to evaluate your home’s structural integrity, existing wall composition, and overall property condition. They’ll examine your exterior walls for damage, damp issues, or necessary repairs that must be addressed before installation begins.
During this assessment, your surveyor will determine specific insulation requirements based on your property’s construction type, local climate conditions, and building regulations.
They’ll measure wall dimensions, identify potential challenges around windows and doors, and assess fixing methods suitable for your wall type.
You’ll also receive guidance on ventilation needs, as proper airflow must be maintained once the insulation is installed.
This detailed evaluation guarantees your installation plan meets both technical specifications and regulatory compliance.
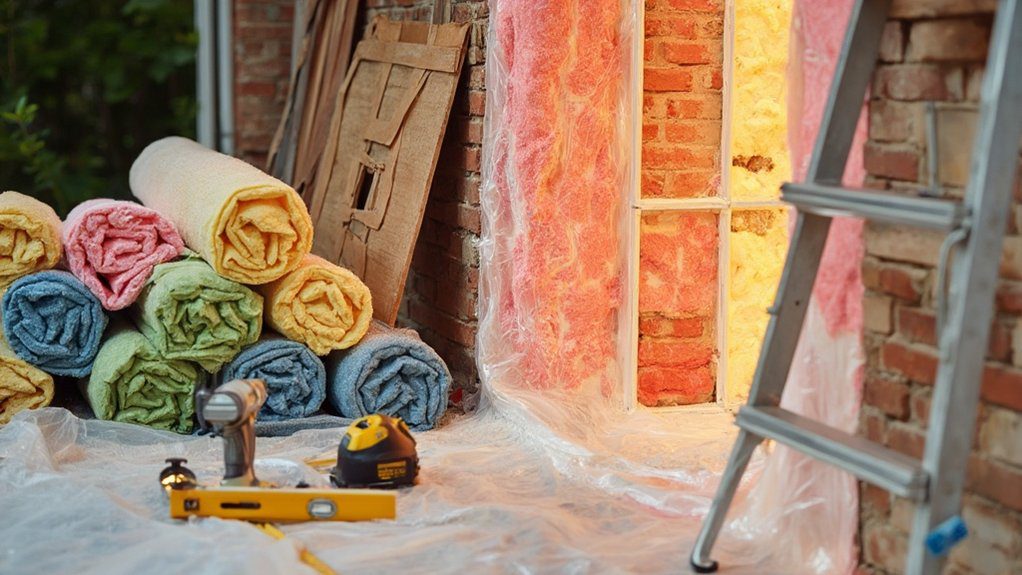
Choosing the Right Insulation Materials
When selecting external wall insulation materials, you’ll need to evaluate several key thermal and physical properties that directly impact performance. The most common types of insulation include expanded polystyrene (EPS), mineral wool, and polyisocyanurate (PIR) boards, each offering different benefits for your home’s specific needs.
Consider your insulation’s R-value, which measures thermal resistance, along with factors like moisture resistance, fire safety ratings, and durability.
EPS provides excellent cost-effectiveness and lightweight properties, while mineral wool offers superior fire resistance and soundproofing.
PIR boards deliver the highest insulation performance per unit thickness, making them ideal for properties with limited external space.
Your choice should align with your local climate conditions, building regulations, and budget while ensuring peak thermal efficiency for your home.
Planning and Building Regulations
Before undertaking any external wall insulation project, you’ll need to secure proper approvals and comply with local building regulations. Check with your local authority to determine if you need building permits, as requirements vary by location and property type.
Listed buildings and homes in conservation areas often face stricter regulatory compliance standards.
You’ll need to submit detailed plans showing the insulation system’s specifications, including materials, thickness, and fixing methods. Your plans must demonstrate compliance with thermal performance requirements and fire safety standards.
Don’t forget to assess the impact on your property’s external appearance and how it affects neighboring buildings.
Ensure your chosen installer understands current building regulations and can provide necessary certificates upon completion. They should help you navigate the approval process and maintain proper documentation throughout the project.
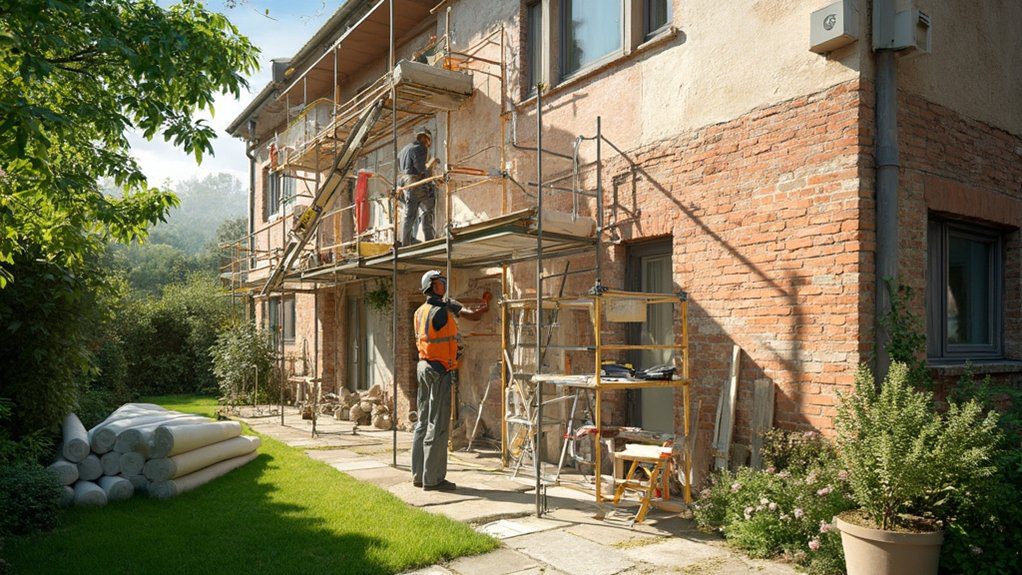
Preparing Your Home’s Exterior
Proper exterior preparation forms the foundation of a successful external wall insulation installation. You’ll need to thoroughly assess your walls’ condition before proceeding with any work.
Start with a thorough structural assessment to identify cracks, damp patches, or deteriorating mortar that could compromise the insulation’s effectiveness.
Begin exterior cleaning by removing all dirt, algae, and loose materials using a pressure washer. You’ll want to detach exterior fixtures like downpipes, satellite dishes, and outdoor lighting to guarantee complete coverage.
It’s crucial to repair any identified structural issues and allow the walls to dry completely before installation begins. If you’ve got old render, test its bond strength and remove any loose sections.
Remember to protect windows and doors with appropriate covering during the preparation phase.
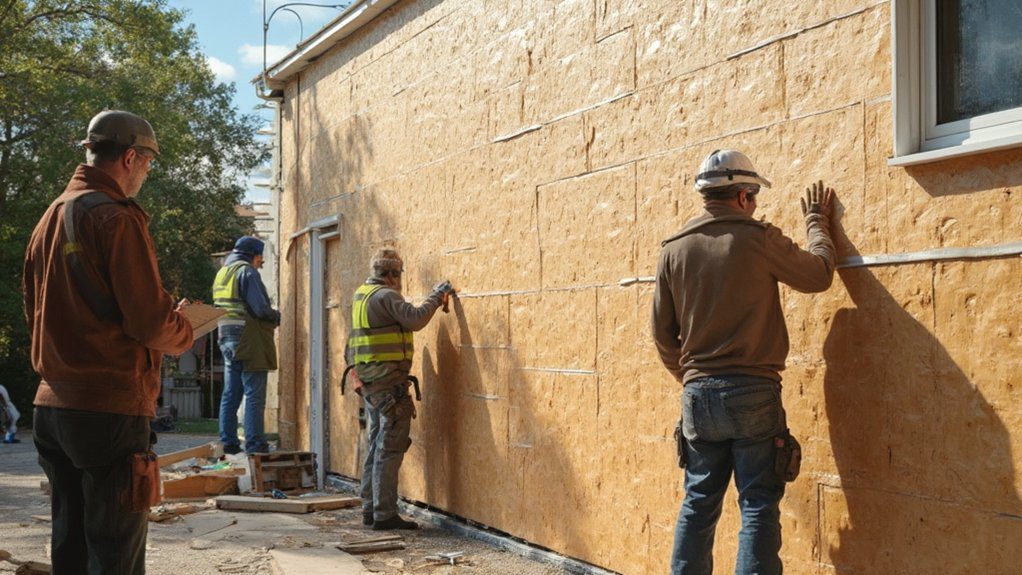
Installing the Support Framework

The support framework serves as the critical foundation for your external wall insulation system. You’ll need to choose between timber battens or aluminum rail systems based on your wall’s condition and insulation requirements.
| Framework Type | Installation Technique |
|---|---|
| Timber Battens | Direct fixing to wall with mechanical anchors |
| Aluminum Rails | Bracket mounting with thermal breaks |
| Hybrid Systems | Combination fixing with adjustable brackets |
During installation, you’ll want to guarantee precise vertical and horizontal alignment using laser levels. Spacing between support components typically ranges from 400mm to 600mm, depending on your insulation board specifications and local building codes. The framework must be thoroughly secured to handle both the insulation system’s weight and potential wind loads. You’ll also need to incorporate expansion joints at strategic points to accommodate thermal movement.
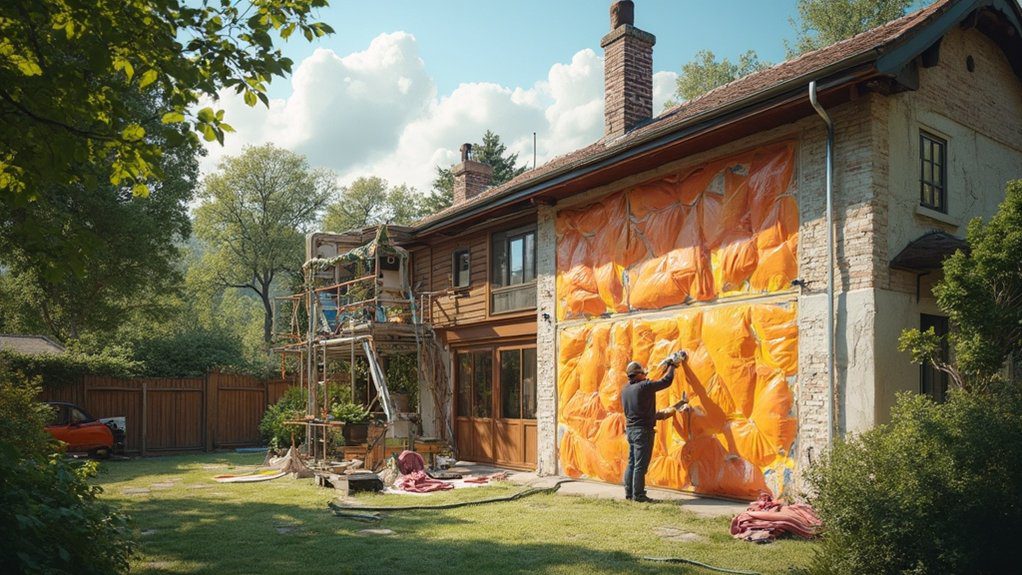
Applying the Insulation Boards
With your support framework securely in place, applying insulation boards requires methodical attention to detail and precise positioning.
You’ll need to select from various insulation board types, including expanded polystyrene (EPS), mineral wool, or phenolic boards, based on your home’s specific requirements.
Start at the bottom of your wall and work upward, using a staggered pattern to prevent thermal bridging.
You’ll apply adhesive to the boards using the dot and dab insulation application technique, ensuring 40% coverage of each board’s surface.
Position boards tightly against each other, checking for gaps that could compromise thermal efficiency.
Secure them with mechanical fixings – typically 5 per square meter.
Cut boards precisely around windows, doors, and service penetrations using a fine-toothed saw.
Remember to check each board’s level and alignment as you progress.
Reinforcement and Weather Protection
Safeguarding your external wall insulation requires a robust reinforcement mesh system and weather-resistant finish.
You’ll need to embed fiberglass reinforcement materials into a base coat of render, ensuring complete coverage across all insulation boards. This mesh strengthens the system and prevents cracking from thermal movement or impact.
Once the base coat’s dried, you’ll apply specialized weather barriers in the form of a final render coat. This protective layer needs to be vapor-permeable while remaining waterproof, allowing your walls to breathe while keeping moisture out.
You’ll want to choose a finish that’s compatible with your climate zone – silicone-based renders work well in areas with high rainfall, while mineral renders suit drier conditions.
Pay special attention to corners, joints, and window reveals, as these areas need extra reinforcement to prevent future issues.
Final Rendering and Finishing Touches
Building upon your weatherproofing layers, proper rendering creates the final aesthetic appeal while maintaining protection.
You’ll need to apply multiple coats of render, allowing each layer to cure completely before proceeding. The base coat provides essential adhesion, while the finish coat determines your wall’s final appearance.
For aesthetic options, you can choose between smooth, textured, or patterned finishes. Modern renders come in various colors and compositions, eliminating the need for additional painting.
Your final touches should include sealing around windows, doors, and other penetrations with appropriate weatherproof sealants. Don’t forget to install proper drip edges and corner beads for clean, professional-looking edges.
Once completed, you’ll have transformed your home’s exterior while creating an efficient thermal envelope that’ll serve you for years to come.
Quality Control and Inspection
Throughout the installation process, regular quality control checks and inspections are vital to assure your external wall insulation system meets industry standards and building regulations.
You’ll need to make certain that your contractor follows strict inspection protocols at significant stages, including substrate preparation, insulation board fixing, base coat application, and final render.
Your installer should document each quality control checkpoint, measuring adhesive coverage, checking board alignment, and verifying reinforcement mesh positioning.
They’ll test the surface for flatness and inspect all joints, edges, and corners.
You’ll want to confirm they’re following manufacturer-specified quality standards for material mixing ratios and application temperatures.
Request a final inspection report that details moisture readings, adhesion tests, and overall system compliance.
This documentation’s critical for warranty validation and future reference.
Aftercare and Maintenance Guidelines
To maximize the lifespan of your external wall insulation system, you’ll need to implement a regular maintenance routine and follow specific aftercare protocols. Your insulation longevity depends on consistent inspection and timely repairs.
| Maintenance Task | Frequency | Action Required |
|---|---|---|
| Visual Inspection | Monthly | Check for cracks, damage |
| Cleaning | Bi-annually | Wash with mild detergent |
| Joint Review | Annually | Inspect seals, sealants |
| Impact Assessment | Quarterly | Look for physical damage |
| Drainage Check | Bi-annually | Clear gutters, outlets |
Establish a maintenance schedule that includes regular cleaning to prevent algae growth and dirt accumulation. You’ll need to address any damage promptly to prevent moisture infiltration. When you notice cracks or deterioration, contact your installer immediately. Remember, proper maintenance now prevents costly repairs later and guarantees your insulation system performs efficiently for years to come.
Frequently Asked Questions
Can I Install External Wall Insulation if I Live in a Listed Building?
You’ll need special permission due to listed building regulations before installing external insulation. Due to preservation requirements and insulation installation challenges, you’ll likely face significant restrictions or may not receive approval at all.
Will External Wall Insulation Affect My Home’s Satellite TV Reception?
You’ll need to evaluate possible satellite interference. While external wall insulation can affect signal quality, your installer can help relocate your dish or adjust its position to maintain ideal reception.
How Long Does External Wall Insulation Typically Last Before Needing Replacement?
You’ll find that properly installed external wall insulation has an installation lifespan of 25-30 years. With regular maintenance requirements like annual inspections and prompt repairs, you can extend its effectiveness beyond these typical timeframes.
Can External Wall Insulation Be Painted With Any Type of Exterior Paint?
Like choosing the perfect outfit, you can’t use just any paint on your external wall insulation. You’ll need specialized breathable exterior masonry paints that work with your insulation colors and protect the system’s functionality.
Does External Wall Insulation Help Reduce Outside Noise Entering My Home?
Yes, you’ll notice significant noise reduction benefits from external wall insulation. It creates a solid barrier that dampens outside sounds, typically reducing noise levels by 8-10 decibels, making your home’s interior considerably quieter.
Conclusion
Installing external wall insulation transforms your home like a butterfly emerging from its cocoon. You’ll need to maintain regular inspections of the finished system, checking for any cracks or damage at least twice yearly. Keep drainage points clear, clean the surface periodically, and address any issues immediately to protect your investment. When properly maintained, your external wall insulation system will deliver superior thermal performance for decades to come.


85 Responses
Excellent blog here! Also your web site loads up very fast! What web host are you using? Can I get your affiliate link to your host? I wish my website loaded up as quickly as yours lol
Great post. I am facing a couple of these problems.
Hey There. I found your blog using msn. This is a very well written article. I’ll make sure to bookmark it and return to read more of your useful info. Thanks for the post. I will definitely comeback.
I have not checked in here for some time as I thought it was getting boring, but the last several posts are good quality so I guess I’ll add you back to my everyday bloglist. You deserve it my friend 🙂
Hello there, just turned into aware of your blog via Google, and found that it is truly informative. I’m gonna be careful for brussels. I’ll appreciate should you proceed this in future. Numerous folks shall be benefited out of your writing. Cheers!
It’s hard to find knowledgeable people on this topic, but you sound like you know what you’re talking about! Thanks
I have been exploring for a bit for any high-quality articles or blog posts in this sort of space . Exploring in Yahoo I ultimately stumbled upon this site. Reading this information So i am glad to convey that I have an incredibly excellent uncanny feeling I found out exactly what I needed. I such a lot indisputably will make sure to do not forget this web site and provides it a glance regularly.
Hi there! I know this is kind of off topic but I was wondering if you knew where I could get a captcha plugin for my comment form? I’m using the same blog platform as yours and I’m having difficulty finding one? Thanks a lot!
I always was interested in this topic and still am, appreciate it for putting up.
Hello my friend! I wish to say that this article is amazing, great written and come with almost all important infos. I would like to look extra posts like this .
Good day! Do you use Twitter? I’d like to follow you if that would be okay. I’m absolutely enjoying your blog and look forward to new posts.
I’m still learning from you, as I’m trying to achieve my goals. I certainly enjoy reading everything that is posted on your blog.Keep the posts coming. I loved it!
I want to express appreciation to this writer for rescuing me from such a situation. As a result of searching throughout the search engines and getting opinions which are not pleasant, I was thinking my entire life was done. Existing minus the approaches to the problems you have solved all through your entire article content is a crucial case, as well as the kind which might have in a negative way affected my entire career if I hadn’t discovered your blog. Your own expertise and kindness in controlling almost everything was helpful. I don’t know what I would have done if I hadn’t discovered such a thing like this. It’s possible to at this point relish my future. Thank you so much for the specialized and result oriented help. I will not be reluctant to endorse your web blog to any person who should get guidelines about this subject.
Your article helped me a lot, is there any more related content? Thanks!
Your article helped me a lot, is there any more related content? Thanks! https://accounts.binance.info/register-person?ref=IXBIAFVY
I don’t think the title of your article matches the content lol. Just kidding, mainly because I had some doubts after reading the article. https://accounts.binance.info/ph/register-person?ref=IU36GZC4
Thank you for your sharing. I am worried that I lack creative ideas. It is your article that makes me full of hope. Thank you. But, I have a question, can you help me?
Thank you for your sharing. I am worried that I lack creative ideas. It is your article that makes me full of hope. Thank you. But, I have a question, can you help me?
inscription melbet melbet apk
partenaires 1win 1win apk
Производим пластиковые https://zavod-dimax.ru окна и выполняем профессиональную установку. Качественные материалы, точные размеры, быстрый монтаж и гарантийное обслуживание для комфорта и уюта в помещении.
Жалюзи от производителя https://balkon-pavilion.ru изготовление, продажа и профессиональная установка. Большой выбор дизайнов, точные размеры, надёжная фурнитура и комфортный сервис для квартир и офисов.
Изделия из пластмасс https://ftk-plastik.ru собственного производства. Продажа оптом и в розницу, широкий ассортимент, надёжные материалы и стабильные сроки. Выполняем заказы любой сложности по техническому заданию клиента.
Производство оборудования https://repaircom.ru с предварительной разработкой и адаптацией под требования клиента. Качественные материалы, точные расчёты, соблюдение сроков и техническая поддержка.
Торговая мебель https://woodmarket-for-business.ru от производителя для бизнеса. Витрины, стеллажи, островные конструкции и кассовые модули. Индивидуальный подход, надёжные материалы и практичные решения для продаж.
Szukasz kasyna? kasyno online w Polsce: wybor najlepszych stron do gry. Licencjonowane platformy, popularne sloty i kasyna na zywo, wygodne metody platnosci, uczciwe warunki i aktualne oferty.
Grasz w kasynie? Kasyno internetowe w Polsce to najlepsze miejsca do gry w latach 2025–2026. Zaufane strony, sloty i gry na zywo, przejrzyste warunki, wygodne wplaty i wyplaty.
Ищешь блины для штанки? блины для штанги оптом для эффективных силовых тренировок. Чугунные и резиновые диски, разные веса, долговечность и удобство использования. Решение для новичков и опытных спортсменов.
Производим торговую мебель https://woodmarket-for-business.ru для розничного бизнеса и сетевых магазинов. Функциональные конструкции, современный дизайн, точные размеры и полный цикл работ — от проекта до готового решения.
Оборудование для отопления https://thermostock.ru и водоснабжения: котлы, циркуляционные насосы, радиаторы, мембранные баки и комплектующие от ведущих производителей. Что вы получаете: сертифицированные товары, прозрачные цены, оперативную обработку заказа. Создайте комфортный микроклимат в доме — выбирайте профессионалов!
Нужен памятник? памятник уфа — гранитные и мраморные изделия. Индивидуальные проекты, точная обработка камня, оформление и монтаж. Надёжное качество и внимательное отношение к деталям.
Нужен памятник? памятник уфа — гранитные и мраморные изделия. Индивидуальные проекты, точная обработка камня, оформление и монтаж. Надёжное качество и внимательное отношение к деталям.
Нужно авто? привезти машину из китая поиск, проверка, оформление и доставка авто из разных стран. Прозрачные условия, помощь на всех этапах и сопровождение сделки до получения автомобиля.
студия веб дизайна дизайн загородного дома СПб
Нужен памятник? памятник уфа — гранитные и мраморные изделия. Индивидуальные проекты, точная обработка камня, оформление и монтаж. Надёжное качество и внимательное отношение к деталям.
Нужен проектор? интернет-магазин проекторов большой выбор моделей для дома, офиса и бизнеса. Проекторы для кино, презентаций и обучения, официальная гарантия, консультации специалистов, гарантия качества и удобные условия покупки.
Philly roofing? Roofing Philadelphia new roof installation, leak repair, restoration, and maintenance of roofing systems. Experienced specialists, modern technologies, reliable materials, and a personalized approach to each project.
Проблемы с авто? автоэлектрик фольксваген спб диагностика, ремонт электрооборудования, блоков управления, освещения и систем запуска. Опыт, современное оборудование и точное определение неисправностей.
Celebrity World Care https://celebrityworldcare.com интернет-магазин профессиональной медицинской и натуральной косметики для ухода за кожей при ихтиозе, дерматитах, псориазе и других дерматологических состояниях. Сертифицированные средства с мочевиной, без отдушек и парабенов. Доставка по России.
Модульные дома https://modulndom.ru под ключ: быстрый монтаж, продуманные планировки и высокое качество сборки. Подходят для круглогодичного проживания, отличаются энергоэффективностью, надежностью и возможностью расширения.
Медицинская комиссия справка https://med-spravki-msk.ru
Специализированный коррекционно-речевой https://neyroangel.ru детский сад для детей с особенностями развития в Москве. Беремся за самые тяжелые случаи, от которых отказываются другие. Нейропсихолог, логопед, запуск речи. Государственная лицензия: Л035-01298-77/01604531 от 09.12.24
Рэмси Диагностика: https://remsi-med.ru Сеть высокотехнологичных диагностических центров (МРТ, КТ). Точные исследования на оборудовании экспертного класса и качественная расшифровка снимков.
Детский Доктор: https://kidsmedic.ru Специализированный медицинский центр для детей. Квалифицированная помощь педиатров и узких специалистов для здоровья вашего ребенка с первых дней жизни.
Полесская ЦРБ: https://polesskcrb.ru Официальный портал центральной районной больницы Калининградской области. Информация об услугах, расписание врачей и важные новости здравоохранения для жителей региона.
АрсМед: https://arsmedclinic.ru Многопрофильная клиника, предлагающая широкий выбор медицинских услуг от диагностики до лечения. Современный подход и комфортные условия для пациентов всех возрастов.
проектор изображения магазин проекторов в Москве
Любишь азарт? ап икс играть онлайн в популярные игры и режимы. Быстрый вход, удобная регистрация, стабильная работа платформы, понятный интерфейс и комфортные условия для игры в любое время на компьютере и мобильных устройствах.
Любишь азарт? ап икс сайт играть онлайн легко и удобно. Быстрый доступ к аккаунту, понятная навигация, корректная работа на любых устройствах и комфортный формат для пользователей.
лучшие химчистки обуви химчистка обуви в москве
Your point of view caught my eye and was very interesting. Thanks. I have a question for you. https://accounts.binance.com/da-DK/register-person?ref=V3MG69RO
флисовый костюм мужской костюм мужской классический
Thank you for your sharing. I am worried that I lack creative ideas. It is your article that makes me full of hope. Thank you. But, I have a question, can you help me?
Электромонтажные работы https://electric-top.ru в Москве и области. Круглосуточный выезд электриков. Гарантия на работу. Аварийный электрик.
коррозия у авто? антикор днища автомобиля цена эффективная защита от влаги, соли и реагентов. Комплексная обработка кузова и днища, качественные составы и надёжный результат для новых и подержанных авто.
Коррозия на авто? антикор мы используем передовые шведские материалы Mercasol и Noxudol для качественной защиты днища и скрытых полостей кузова. На все работы предоставляется гарантия сроком 8 лет, а цены остаются доступными благодаря прямым поставкам материалов от производителя.
Планируете мероприятие? мероприятия ai уникальные интерактивные форматы с нейросетями для бизнеса. Мы разрабатываем корпоративные мероприятия под ключ — будь то тимбилдинги, обучающие мастер?классы или иные активности с ИИ, — с учётом ваших целей. Работаем в Москве, Санкт?Петербурге и регионах. AI?Event специализируется на организации корпоративных мероприятий с применением технологий искусственного интеллекта.
Противопожарные двери https://bastion52.ru купить для защиты помещений от огня и дыма. Большой выбор моделей, классы огнестойкости EI30, EI60, EI90, качественная фурнитура и соответствие действующим стандартам.
Нужны цветы? заказать цветы с доставкой закажите цветы с доставкой на дом или в офис. Большой выбор букетов, свежие цветы, стильное оформление и точная доставка. Подойдёт для праздников, сюрпризов и важных событий.
Любишь азарт? комета казино онлайн современные слоты, live-форматы, понятные правила и удобный доступ с ПК и смартфонов. Играйте онлайн в удобное время.
Лучшее казино ап икс скачать играйте в слоты и live-казино без лишних сложностей. Простой вход, удобный интерфейс, стабильная платформа и широкий выбор игр для отдыха и развлечения.
Играешь в казино? ап икс казино Слоты, рулетка, покер и live-дилеры, простой интерфейс, стабильная работа сайта и возможность играть онлайн без сложных настроек.
Лучшее казино апх играйте в слоты и live-казино без лишних сложностей. Простой вход, удобный интерфейс, стабильная платформа и широкий выбор игр для отдыха и развлечения.
Играешь в казино? ап икс официальный Слоты, рулетка, покер и live-дилеры, простой интерфейс, стабильная работа сайта и возможность играть онлайн без сложных настроек.
Production company video production company in milan
Die besten Spiele Cash Truck Begins von Quickspin bieten eine spannende Unterhaltung fur alle Casino-Liebhaber. Mit verschiedenen Themen und lukrativen Bonusangeboten wird das Spielerlebnis noch aufregender. Egal ob Slots, Roulette oder Blackjack, die Vielfalt an Moglichkeiten zieht Spieler aus aller Welt an, wahrend sie bequem von zuhause aus eintauchen konnen.
Русские подарки и сувениры купить в широком ассортименте. Классические и современные изделия, национальные символы, качественные материалы и оригинальные идеи для памятных и душевных подарков.
**mounjaboost**
MounjaBoost is a next-generation, plant-based supplement created to support metabolic activity, encourage natural fat utilization, and elevate daily energywithout extreme dieting or exhausting workout routines.
**herpafend**
Herpafend is a natural wellness formula developed for individuals experiencing symptoms related to the herpes simplex virus. It is designed to help reduce the intensity and frequency of flare-ups while supporting the bodys immune defenses.
**prostafense**
ProstAfense is a premium, doctor-crafted supplement formulated to maintain optimal prostate function, enhance urinary performance, and support overall male wellness.
**boostaro reviews**
Boostaro is a purpose-built wellness formula created for men who want to strengthen vitality, confidence, and everyday performance.
**neurosharp official**
Neuro Sharp is an advanced cognitive support formula designed to help you stay mentally sharp, focused, and confident throughout your day.
Нужно казино? ап х современные игры, простой вход, понятный интерфейс и стабильная работа платформы. Играйте с компьютера и мобильных устройств в любое время без лишних сложностей.
Самые качественные металлические блины для штанги широкий выбор весов и форматов. Надёжные материалы, удобная посадка на гриф, долговечное покрытие. Подходят для фитнеса, пауэрлифтинга и регулярных тренировок.
A sports portal http://sbs-sport.com.az with breaking news, statistics, and expert commentary. Match schedules, transfers, interviews, and competition results are available in real time.
Live match https://sporx.com.az results, the latest sports news, transfers, and today’s TV schedule. Live updates, key events, and all sports information in one portal.
Нужна курсовая? написать курсовую Подготовка работ по заданию, методическим указаниям и теме преподавателя. Сроки, правки и сопровождение до сдачи включены.
Авиабилеты по низким ценам https://tutvot.com посуточная аренда квартир, вакансии без опыта работы и займы онлайн. Актуальные предложения, простой поиск и удобный выбор решений для путешествий, работы и финансов.
заклепка вытяжная 10 заклепка вытяжная
Официальный проект KRAKEN предлагает лучшую защиту среди всех darknet маркетплейсов
По квартирі https://cleaninglviv.top/ актуально
Really Appreciate this blog post, is there any way I can receive an email sent to me when you publish a fresh post?
ДВС и КПП https://vavtomotor.ru автозапчасти для автомобилей с гарантией и проверенным состоянием. В наличии двигатели и коробки передач для популярных марок, подбор по VIN, быстрая доставка и выгодные цены.
Топовое онлайн казино играть в слот резидент онлайн-слоты и live-казино в одном месте. Разные режимы игры, поддержка мобильных устройств и удобный старт без установки.
View details: http://pr0cy.com/informers.html?address=http://coberm.net/